Use VSTS to Build and Publish to an Azure Web App with Continuous Deployment
This tutorial shows you how to create an ASP.NET Core web app using Visual Studio and deploy it from Visual Studio to Azure App Service using continuous deployment.
Note
To complete this tutorial, you need a Microsoft Azure account. If you don’t have an account, you can activate your MSDN subscriber benefits or sign up for a free trial. You will also need a Visual Studio Team Services account. If you don’t have an account, you can sign up for free.
Prerequisites
This tutorial assumes you already have the following:
- ASP.NET Core (runtime and tooling). Hosted Build Pool servers in VSTS already have RC2 tooling installed.
- Git
- The Trackyon Advantage extension installed into your team services account. This adds an available zip task for later steps.
Setup VSTS Build
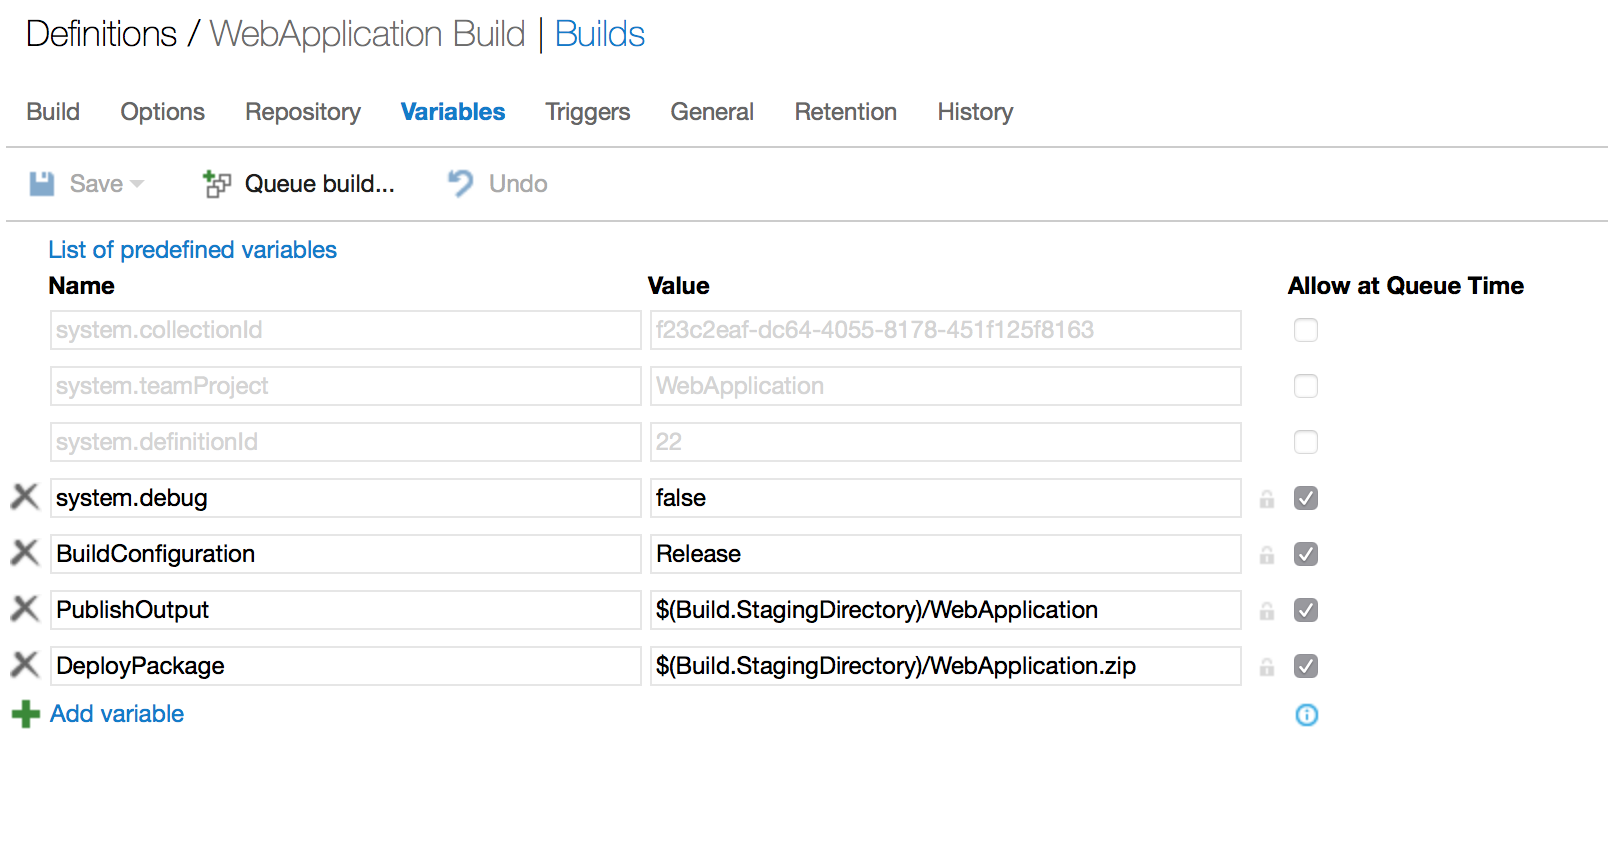
- Setup some build variables to make later steps clearer and easier to retain consistent paths across build steps.
Create a variable for PublishOutput and set it to your desired path. We have used $(Build.StagingDirectory)/WebApplication
Create a variable for DeployPackage and set it to the path you would like the zipped web package to be at. We have used $(Build.StagingDirectory)/WebApplication.zip to have it alongside our published output.
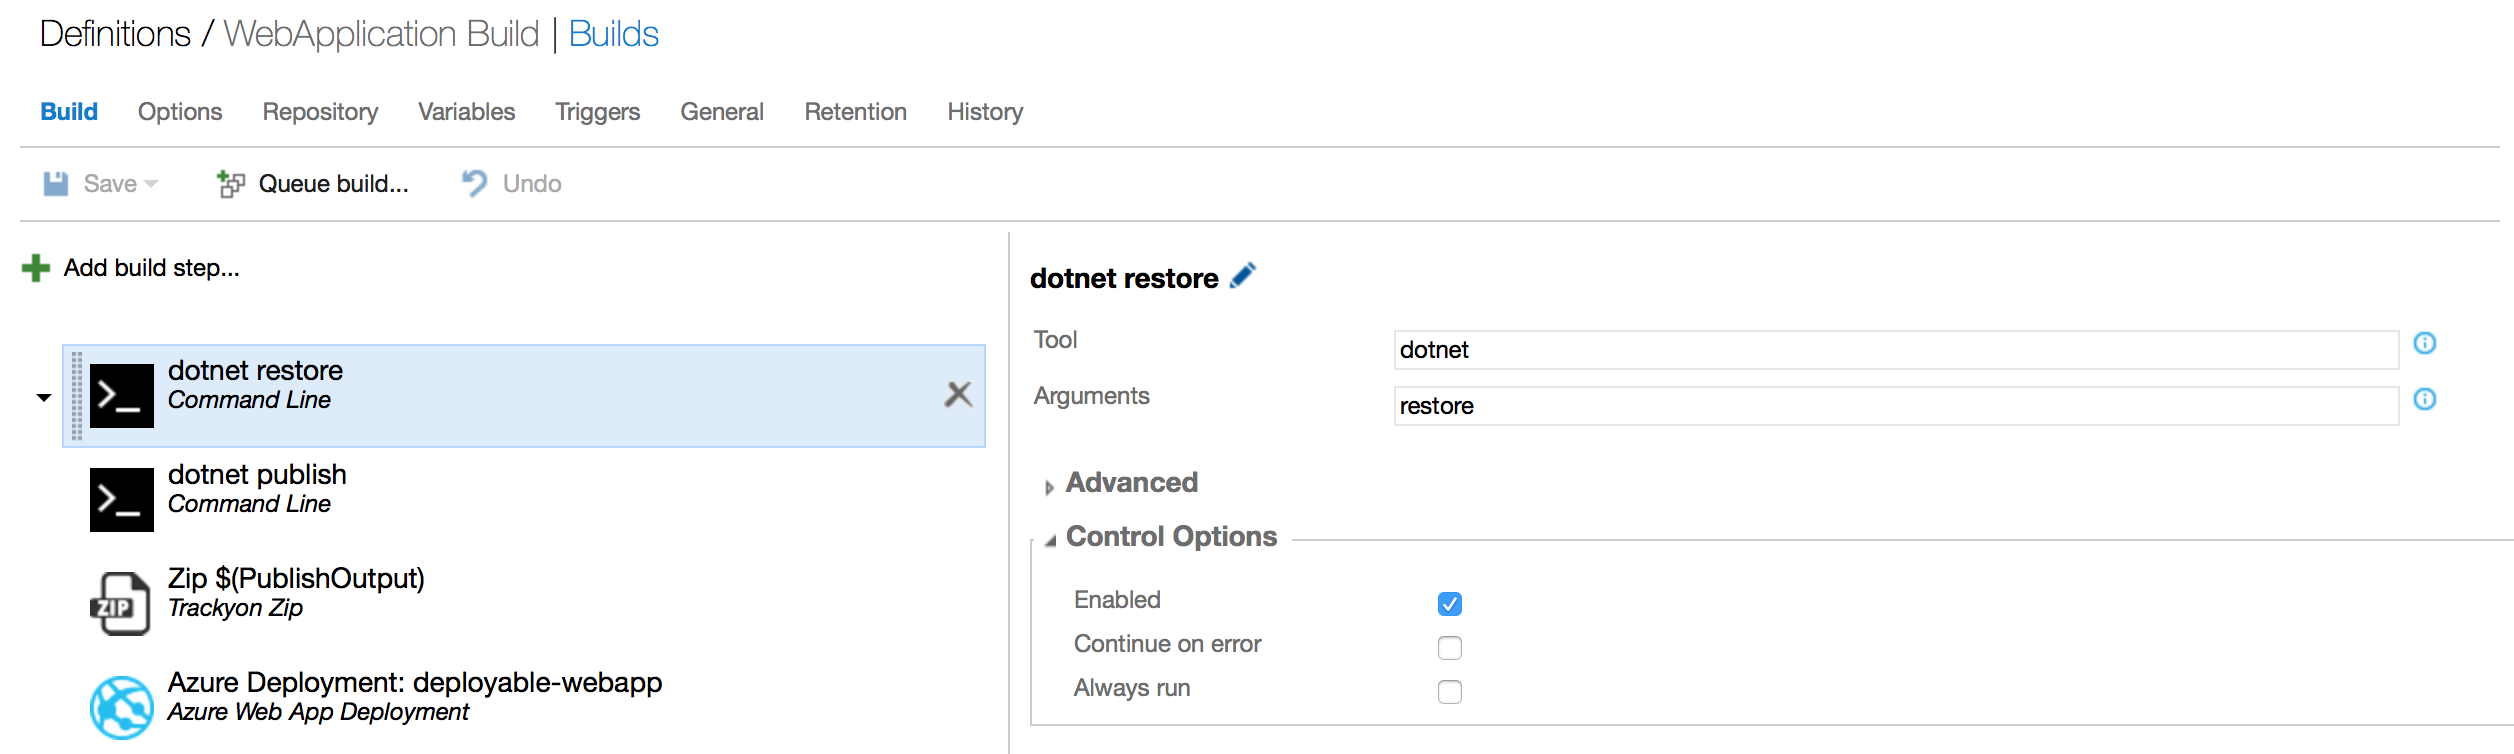
- Use a Command Line build step to restore packages.
Click Add build step... and choose Utility > Command Line > Add
- Set the arguments for the build step as:
- Tool: dotnet
- Arguments: restore
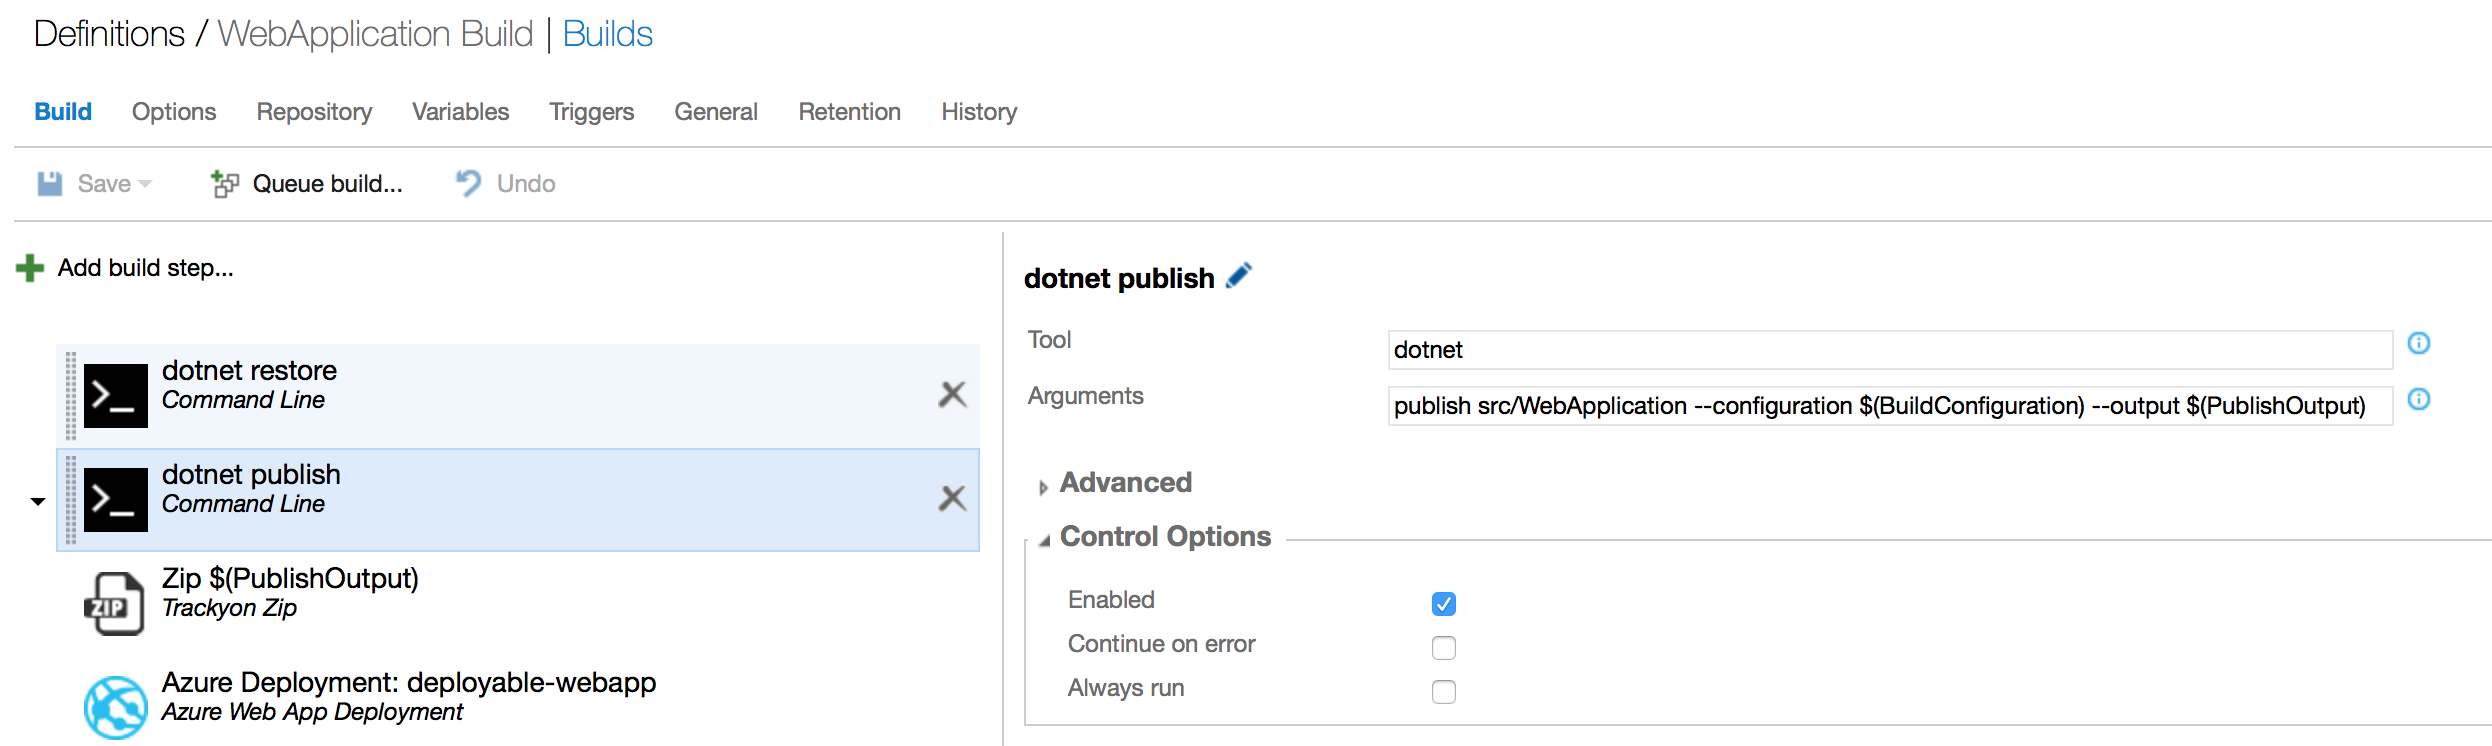
- Use another Command Line build step to publish the project.
Click Add build step... and choose Utility > Command Line > Add
- Set the arguments for the build step as:
- Tool: dotnet
- Arguments: publish src/WebApplication –configuration $(BuildConfiguration) –output $(PublishOutput)
Replace src/WebApplication to the path of your app to be deployed as appropriate
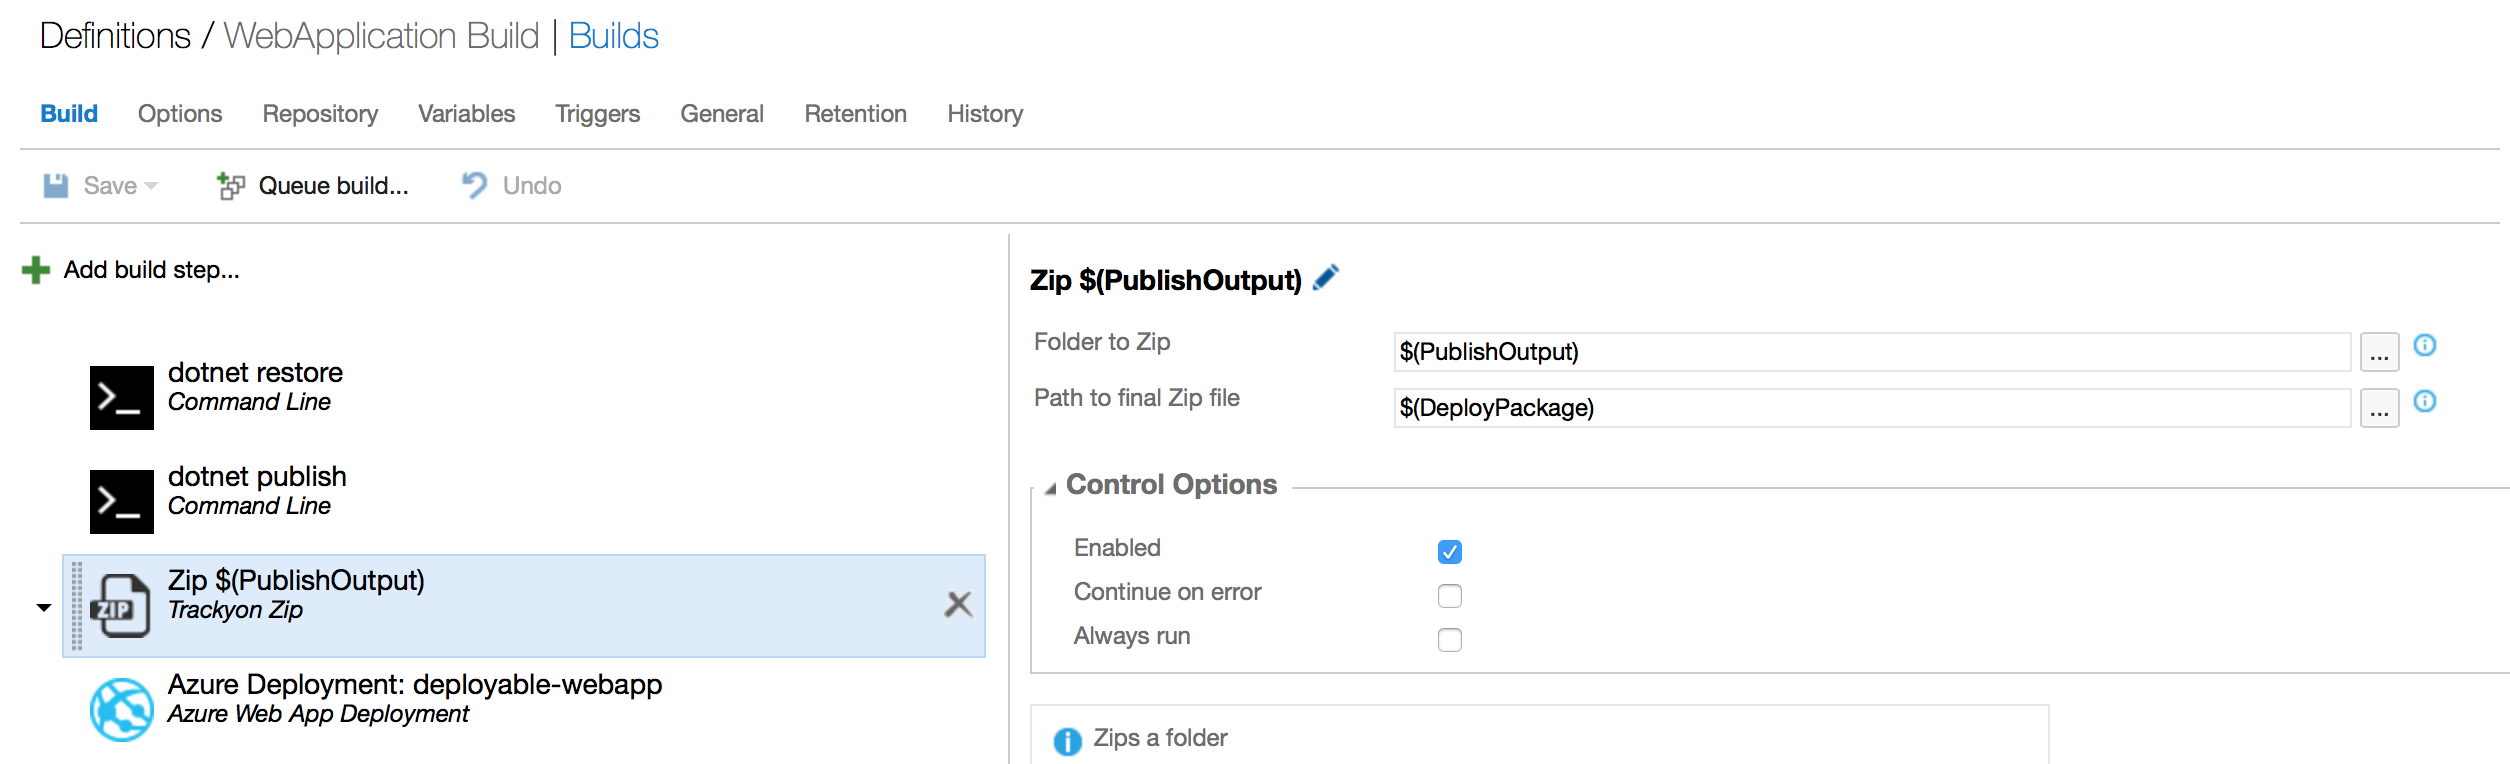
- Compress the published output so it can be deployed to Azure App Service. We will use the Trackyon Advantage task we installed to zip the contents of our published output for deployment.
Click Add build step... and choose Utility > Trackyon Zip > Add
- Set the arguments for the zip build step as:
- Folder to Zip: $(PublishOutput)
- Path to final Zip file: $(DeployPackage)
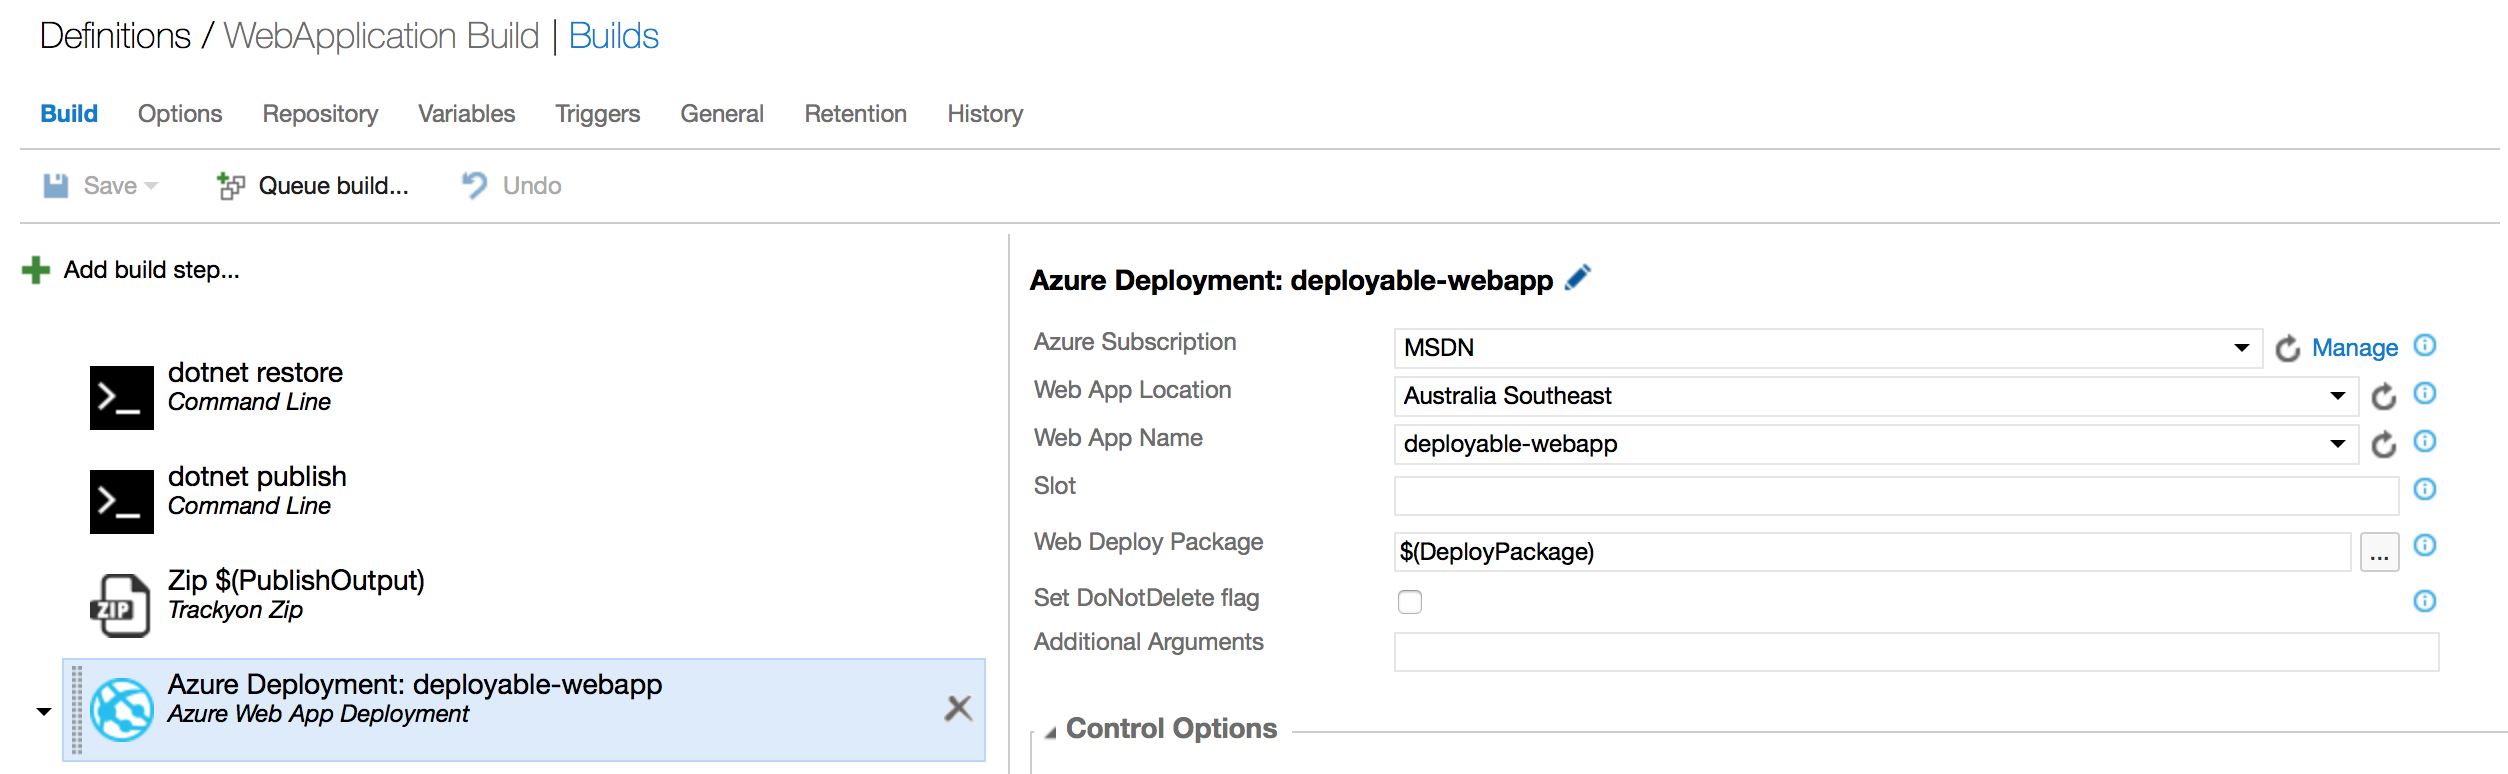
- Use the Azure Web App Deployment build step to publish the compressed publish output to your Azure Web App. The Web Deploy Package will be the output of the contents compressed in step 4. In this case, we re-use the variable for it’s path we setup earlier.
Click Add build step... and choose Deploy > Azure Web App Deployment > Add
- Set the arguments for the deployment step as:
- Azure Subscription: <your configured azure connection>
- Web App Location: <desired region>
- Web App Name: <desired app service name>
- Web Deploy Package: $(DeployPackage)
Use VSTS Release
VSTS Release management can alternatively be used to manage the release pipeline from the VSTS build. We require a small change to the build pipeline and setup of the release process.
- If configured, remove the Azure Web App Deployment step from the VSTS build setup in the previous section.
- Add a Copy and Publish Build Artifacts step to the build pipeline
Click Add build step... and choose Utility > Copy and Publish Build Artifacts > Add
- Set the arguments for the copy and publish step as:
- Contents: $(DeployPackage)
- Arifact Name: DeployPackage
- Artifact Type: Server
- You will be able to create a release definition and link to the Build definition and utilise the artifacts copied from step 2 here for publishing.